Daisy Chain Bracelet Tutorial: Simple Beaded Flower Patterns
Create charming daisy chain bracelets with simple beaded flower patterns. Perfect for beginners, this tutorial uses seed beads, memory wire, and crimps for a delicate, flower-inspired design.
Daisy chain bracelets are a timeless and charming jewelry piece that combines simplicity with elegance. These bracelets feature delicate flower patterns created using seed beads, memory wire, and basic jewelry findings. Perfect for beginners, daisy chain bracelets are easy to make and require minimal materials. The tutorial provided here will guide you through creating beautiful, flower-inspired designs that can be customized to suit any style or occasion. With step-by-step instructions, you’ll learn how to craft stunning bracelets that resemble daisies, adding a touch of nature to your jewelry collection. This comprehensive guide ensures that even those new to beading can create professional-looking results.
Why Daisy Chain Bracelets Are Popular
Daisy chain bracelets have gained immense popularity due to their timeless appeal and delicate beauty. They are easy to create, requiring minimal materials like seed beads, memory wire, and basic jewelry findings. The simplicity of the design makes them accessible to both beginners and experienced crafters. These bracelets are versatile, making them suitable for various occasions, from casual wear to gifts. Their customizable nature allows for personal touches, such as different bead colors or added embellishments. Additionally, the nostalgic charm of daisy chain bracelets resonates with many, making them a popular choice for those who appreciate handcrafted jewelry and unique, nature-inspired designs.
What You Will Learn in This Tutorial
In this comprehensive guide, you will learn how to craft beautiful daisy chain bracelets using simple beaded flower patterns. The tutorial covers essential techniques, such as creating daisy flowers, securing them to the chain, and finishing the bracelet neatly. You will discover how to customize your design by experimenting with bead colors, sizes, and shapes. Additionally, you will gain tips for avoiding common mistakes and keeping your work neat. Whether you’re a beginner or an experienced crafter, this tutorial provides clear, step-by-step instructions to help you create stunning, handcrafted daisy chain bracelets with ease and confidence.
Materials and Tools Needed
Gather seed beads, memory wire or beading thread, crimps, closures, a beading needle, wire cutters, crimping tool, and a bead mat for a smooth crafting experience.
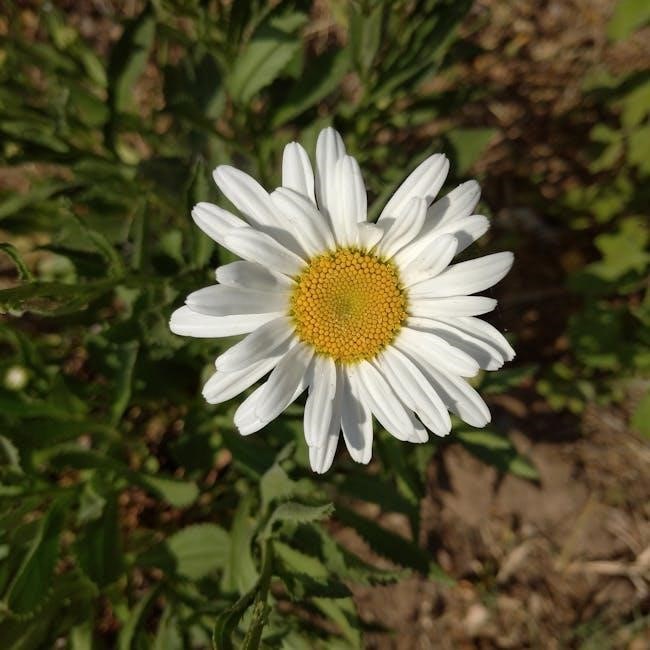
Seed Beads for the Flowers
Seed beads are essential for creating the delicate daisy flowers in your bracelet. Choose high-quality seed beads in sizes 10-12 for visibility and intricate details. Opt for a variety of colors to match your desired design, such as white for petals and yellow for centers. Ensure the beads are uniform in size for a polished look. Selecting the right beads will enhance the overall appearance of your bracelet and make the daisy pattern stand out. Experiment with different hues to create personalized flower designs that reflect your style or complement various outfits. Proper bead selection is key to achieving a professional finish.
Memory Wire or Beading Thread
Memory wire or beading thread is a crucial component for constructing your daisy chain bracelet. Memory wire is ideal for its rigidity and pre-coiled shape, making it easy to form into a bracelet. It holds its shape well and provides a sturdy base for your design. Alternatively, beading thread offers flexibility and is perfect for creating a more delicate chain. Choose a high-quality beading thread that is durable and resistant to fraying. For memory wire, select a length that fits your wrist comfortably. Both options allow for easy attachment of seed beads and flowers, ensuring a secure and professional finish to your bracelet.
Jewelry Findings: Crimps and Closures
Jewelry findings like crimps and closures are essential for securing your daisy chain bracelet. Crimps are small metal beads used to fasten the ends of memory wire or beading thread, ensuring your design stays intact. They come in various sizes and types, such as round or flat, and are secured using a crimping tool. Closures, like lobster claws or toggle clasps, allow the bracelet to be easily opened and closed. Choose a closure that complements your bracelet’s style and provides a secure fit. High-quality findings are crucial for durability and a professional finish, ensuring your handmade bracelet remains beautiful and functional for years to come.
Beading Needle
A beading needle is a must-have tool for creating daisy chain bracelets. Its long, thin shape allows for easy threading of seed beads onto memory wire or beading thread. Use it to weave beads into intricate flower patterns and secure them in place. Choose a needle with an eye large enough to accommodate your thread type. For precision, opt for a beading needle specifically designed for seed beads. This tool simplifies the process of forming daisy flowers and ensures your beads are evenly spaced. A good-quality beading needle is essential for achieving professional-looking results in your handmade bracelet designs.
Wire Cutters and Crimping Tool
Wire cutters and a crimping tool are essential for securing and finishing your daisy chain bracelet. Use wire cutters to trim excess memory wire or thread, ensuring a clean finish. The crimping tool is crucial for crimping beads and closures, preventing beads from coming loose. Proper use of these tools ensures durability and a professional look. For memory wire, cutters with strong jaws are recommended. When crimping, apply gentle pressure to avoid damaging beads or wire. These tools are vital for starting and completing your bracelet, ensuring a secure and polished final product. They help maintain the integrity of your design, making them indispensable for beaders.
Work Surface and Bead Mat
A clean, flat work surface and a bead mat are indispensable for creating daisy chain bracelets. A bead mat provides a soft, padded surface that prevents beads from rolling away, keeping them organized and within reach. It also protects your work surface from damage and reduces noise. Choose a mat with a non-slip backing for stability. Good lighting is essential to see small seed beads clearly. A well-prepared workspace ensures efficiency and reduces frustration. Organize your tools and materials on the mat to streamline the beading process. A dedicated workspace and bead mat are key to crafting beautiful, intricate designs with ease and precision.
Basic Techniques for Beaded Flowers
Master essential skills like stringing beads, forming flower patterns, and securing them to the chain. These simple techniques are foundational for creating beautiful daisy chain designs.
Starting the Bracelet with Jewelry Crimps
Begin by attaching jewelry crimps to one end of the memory wire or beading thread. This step ensures a secure base for your bracelet. Use crimping pliers to flatten the crimp, creating a small loop. This loop will serve as the foundation for threading your beads and forming the daisy chain pattern. Properly securing the crimp is crucial to prevent the beads from sliding off. Once the crimp is in place, you can start threading the seed beads and forming the first daisy flower. This method provides a clean and professional finish to your bracelet, ensuring durability and a polished look.
Creating the Simple Daisy Flower Pattern
To create the simple daisy flower pattern, begin by threading a seed bead onto the memory wire or beading thread. Loop the wire or thread back through the bead to form the center of the flower. Add a few more beads around the center to create the petals, ensuring they are evenly spaced. Use a beading needle to weave the thread through the beads, securing the flower shape. Repeat this process to form additional daisies, attaching them to the chain as you go. This technique creates a delicate, flower-inspired design that is both elegant and easy to achieve with basic beading skills.
Attaching Flowers to the Chain
To attach the daisy flowers to the chain, thread your beading needle with the remaining memory wire or beading thread. Weave the thread through one of the beads on the daisy flower, then slide the flower onto the chain. Ensure the flower is securely positioned and adjust the spacing as needed. Use a crimp bead to fasten the flower in place, ensuring it sits snugly against the chain. Repeat this process for each daisy, spacing them evenly along the chain. Once all flowers are attached, finish the bracelet by securing the ends with crimps and closures. This method creates a beautiful, balanced design that highlights the delicate daisy flowers.
Design Variations for Daisy Chain Bracelets
Explore creative variations by experimenting with bead colors, adding leaves, or using different wire-wrapping techniques. These modifications allow for personalized, unique designs while maintaining the daisy chain charm.
Using Different Colors for Beads
Using different colors for beads is a great way to add personality to your daisy chain bracelet. Bright, vibrant hues can create a bold, eye-catching look, while pastel shades offer a softer, more delicate appearance. Experiment with seasonal colors, like oranges and yellows for autumn or pinks and reds for spring. You can also match your bead colors to your outfit or favorite jewelry pieces. For a cohesive design, stick to a single color palette or mix complementary tones for contrast. This versatility allows you to tailor your bracelet to any style or occasion, making it uniquely yours. Bead color choice is key to customization.
Adding Leaves to the Daisy Flowers
Add a touch of nature to your daisy chain bracelet by incorporating leaves into the design. Leaves can be created using teardrop or oval-shaped beads, adding depth and realism to the flowers. Attach the leaves near the base of the daisies or intersperse them along the chain for a lush, garden-inspired look. Use green beads to mimic real foliage, or experiment with metallic tones for a modern twist. This detail enhances the overall charm of the bracelet and makes it more visually interesting. Pairing leaves with daisy flowers creates a balanced and harmonious design, perfect for nature lovers. This step allows for creativity and personalization, making your bracelet truly unique.
Creating Variations in Flower Sizes
Varying the size of daisy flowers adds visual interest to your bracelet. Use larger beads or multiple layers of petals for bigger blooms, while smaller beads create delicate, intricate flowers. This technique allows you to mix and match sizes, creating a dynamic design. Experiment with different bead counts or wire wrapping methods to achieve varied proportions. For example, a larger daisy can serve as a focal point, surrounded by smaller flowers for balance. This variation adds depth and personality to your bracelet, making it stand out. Ensure each flower is securely attached to maintain the bracelet’s structural integrity while showcasing your creativity.
Experimenting with Wire Wrapping
Wire wrapping adds a unique touch to your daisy chain bracelet. Use memory wire or craft wire to shape petals and create dimensional flowers. Wrapping techniques can enhance flower details, like forming centers or adding texture. Experiment with different wire gauges for varied effects—thicker wires for bold blooms and thinner wires for delicate accents. Secure beads by wrapping wire around them, ensuring durability. This method also allows for customizing flower shapes and sizes. Combine wire-wrapped flowers with seed beads for a mixed-media look. Practice wrapping techniques to achieve clean, professional finishes. Wire wrapping expands your creative options, making each bracelet truly one-of-a-kind.
Mixing Bead Types and Shapes
Mixing bead types and shapes adds variety to your daisy chain bracelet. Combine seed beads with gemstones, pearls, or crystals for a unique look. Use round beads for petals and bicone beads for centers to create dimension. Experiment with shaped beads, like hearts or flowers, for added interest. Mixing textures, such as matte and glossy beads, enhances visual appeal. For a bold statement, incorporate chunky beads alongside delicate ones. This technique allows for personalized designs, making each bracelet distinctive. Balance is key—avoid overcrowding by spacing larger beads with smaller ones. Play with color and shape combinations to express your creativity and elevate the simplicity of the daisy pattern.
Step-by-Step Instructions
Learn to craft a daisy chain bracelet with easy, step-by-step guidance. From threading seed beads to securing flowers, this tutorial ensures a flawless, professional finish every time.
Starting the Daisy Chain Bracelet
Begin by securing the memory wire or beading thread with jewelry crimps and closures. Thread a seed bead onto the wire, leaving a small loop for flexibility. This loop will serve as the base for your first daisy flower. Next, pass the wire through the bead to form a small circle, ensuring the tension is even. This step creates the foundation for attaching the daisy flowers. Use a bead mat to keep your beads organized and within reach. Once the base is set, you’re ready to start forming the first daisy flower pattern. Keep your workspace clean and your tools nearby for a smooth process.
Forming the First Daisy Flower
To create the first daisy flower, thread a seed bead onto the wire or thread, securing it at the base loop. This bead will serve as the flower’s center. Next, add a petal bead on either side of the center, ensuring they are evenly spaced. Use a beading needle to weave the thread through the beads, forming a circle. Continue adding petals around the center, maintaining even tension to keep the flower flat. Once the petals are in place, pass the thread through the base loop to secure the flower. Trim excess thread and adjust the petals for a natural look. This step sets the foundation for adding more flowers to the chain.
Securing the Flower to the Chain
Once the daisy flower is formed, attach it to the bracelet chain by threading the beading thread through one of the jewelry crimps or closures at the end of the chain. Pull the thread gently to secure the flower in place, ensuring it sits evenly. Use a crimping tool to tighten the crimp, preventing the flower from shifting. Repeat this process for each flower, spacing them evenly along the chain. Make sure the tension is consistent to maintain the bracelet’s flexibility. This step ensures the flowers remain securely attached while allowing the chain to move naturally. Proper securing is key to a durable and professional finish.
Adding More Daisies to the Chain
After securing the first flower, repeat the process to create additional daisies. Thread the beading needle with fresh thread, form a new flower, and attach it to the chain. Ensure each daisy is evenly spaced by measuring the distance between flowers. For consistency, maintain the same number of beads between each daisy. Use crimps to secure each flower, tightening firmly with a crimping tool. Continue this process until the chain is filled with daisies, leaving space for the final closure. Adjust the spacing as needed for a balanced look. This step allows you to build a vibrant, flowering chain that drapes elegantly on the wrist.
Finishing the Bracelet
To complete your daisy chain bracelet, secure the final daisy to the chain using a crimp bead and crimping tool. Trim excess thread with wire cutters. Attach a closure, such as a clasp or toggle, to the end of the memory wire or beading thread. Ensure the closure is tightly secured to prevent the bracelet from coming undone. Double-check all flowers and connections for stability. For a polished finish, tuck any loose threads into the beads using a beading needle. Your bracelet is now ready to wear or gift, featuring delicate daisies that create a charming, floral-inspired accessory.
Troubleshooting Common Mistakes
When creating a daisy chain bracelet, common issues include uneven tension, misaligned flowers, or loose connections. If beads are too tight, flowers may pucker; if too loose, they may sag. To fix, gently adjust thread tension or rethread beads. For misshapen daisies, check bead counts and ensure consistent stitching. Loose crimps can be tightened with a crimping tool. If a flower detaches, reattach it by threading the wire or thread through the bead base. Practice makes perfect—don’t hesitate to redo sections for a polished look. Keeping your workspace tidy and using a bead mat can also help prevent mistakes.

Tips for Success
Choose high-quality beads and findings for durability. Keep tension even while beading to avoid puckering. Practice the daisy pattern to ensure consistency and neatness in your design.
Choosing the Right Beads for Your Design
Selecting the right beads is crucial for your daisy chain bracelet. Opt for seed beads in sizes 11 or 12 for intricate details and a delicate look. For a vibrant appearance, use contrasting colors for the flower centers and petals. Consider the durability and finish of the beads, as they will be handled frequently. Experiment with different bead types, such as bicone crystals or pearl beads, for added texture and sparkle. Matching the bead color to your outfit or theme ensures versatility. Always purchase high-quality beads to ensure longevity and a polished finish. Testing bead combinations on a bead mat can help finalize your design effectively.
Keeping Tension Even While Beading
Maintaining even tension is essential for a professional-looking daisy chain bracelet. Too much tension can cause the beads to pucker, while too little may result in a floppy design. Start by threading your needle with a comfortable length of beading thread or wire, leaving a small tail for finishing. As you weave, gently pull the thread taut but not overly tight. Use a bead mat to keep beads organized and prevent them from shifting. If using memory wire, bend it gently to form the bracelet shape without over-tightening. Periodically check the tension by gently stretching the chain. Even tension ensures the flowers lie flat and the bracelet drapes beautifully on the wrist.
Using Quality Jewelry Findings
Investing in high-quality jewelry findings ensures your daisy chain bracelet is durable and visually appealing. Use sturdy crimps and closures that securely fasten the bracelet, preventing it from coming undone. Opt for bead-specific findings, such as seed bead stops or wire guards, to protect the beads and thread. A reliable beading needle and precise wire cutters are also essential for clean, professional finishes. Avoid cheap materials that may bend or break easily, as they can ruin the bracelet’s appearance and structural integrity. Quality findings enhance both the functionality and beauty of your handmade piece, making it last longer and look more polished.
Avoiding Overcrowding the Chain
Avoid overcrowding the chain to ensure your daisy chain bracelet remains elegant and functional. Overcrowding can make the bracelet look cluttered and cause structural weakness. To prevent this, space the flowers evenly, leaving enough room for movement. Use a bead mat to measure and plan the layout before attaching the flowers. Start by creating a few flowers, then secure them to the chain gradually, checking the spacing as you go. Consistent tension while beading helps maintain a balanced look. If the chain feels too tight, consider using a longer length or reducing the number of flowers. Proper spacing enhances the bracelet’s beauty and durability, ensuring it drapes naturally on the wrist.
Practicing the Daisy Pattern
Mastering the daisy pattern requires practice, but it’s essential for creating a beautiful bracelet. Start by practicing the basic daisy flower pattern separately before attaching it to the chain. Use inexpensive beads for practice to avoid wasting materials. Begin with a simple daisy, focusing on even tension and precise stitching. Once comfortable, gradually incorporate variations like adding leaves or experimenting with colors. Watching video tutorials or step-by-step guides can help refine your technique. Remember, consistency is key to achieving a professional finish. The more you practice, the more confident you’ll become in creating stunning daisy chain bracelets with intricate flower designs.
Inspiration and Creativity
Discover endless creative possibilities with daisy chain bracelets. Style them with seasonal themes, gift them to loved ones, or explore trend-inspired designs for unique, personalized jewelry pieces.
Styling Your Daisy Chain Bracelet
Personalize your daisy chain bracelet by experimenting with different styles. Layer it with other bracelets for a bohemian look or wear it alone for a minimalist aesthetic. Choose bead colors that match your outfit or occasion, such as soft pastels for spring or bold hues for summer. Add a touch of elegance by pairing it with a simple necklace or earrings. For a casual vibe, pair it with a leather cuff or a charm bracelet. Mix and match bead types, like seed beads with crystals, for added texture. Don’t forget to consider seasonal themes—orange and yellow beads for fall or red for winter. Make it truly unique by adding a small charm or tassel for a personalized finish. This versatile accessory can elevate any look, from everyday wear to special events. Let your creativity shine and enjoy the process of making it your own!
Gifting Your Handmade Bracelet
A daisy chain bracelet makes a thoughtful and personalized gift for friends, family, or loved ones. Its delicate, handcrafted design carries sentimental value, showing effort and care. Consider the recipient’s style when choosing bead colors or patterns—pastel shades for a soft look or bold hues for a statement piece. Pair it with a small note or a gift box for a polished presentation. Perfect for birthdays, holidays, or special occasions, this bracelet is a meaningful way to celebrate someone’s unique taste. It’s also a great way to share your passion for beading and inspire others to explore handmade jewelry.
Seasonal and Holiday Designs
Elevate your daisy chain bracelet by incorporating seasonal and holiday themes. Use pastel shades for spring or Easter, vibrant colors for summer, warm tones for autumn, and icy blues for winter. For holidays like Christmas, opt for red and green beads, while Valentine’s Day calls for pink and heart-shaped accents. Halloween can feature black and orange beads with spooky charm additions. Experiment with festive patterns, like snowflake-inspired designs or shamrock motifs for St. Patrick’s Day. These seasonal touches make your bracelet a perfect accessory for celebrations or a thoughtful gift. Customize the beads and colors to match the occasion for a unique, timely piece.
Following Beading Trends
Stay on-trend with your daisy chain bracelet by incorporating current beading styles. Minimalist designs with single daisies or subtle color schemes are popular for everyday wear. Bohemian-inspired bracelets with mixed bead types and earthy tones are also in vogue. For a modern twist, experiment with geometric patterns or metallic accents. Social media platforms and beading communities often highlight trending techniques, such as wire-wrapped daisies or charm additions. Incorporating seasonal beads, like heart-shaped beads for Valentine’s Day or shamrocks for St. Patrick’s Day, keeps your designs fresh. By adapting your daisy chain pattern to current trends, you can create bracelets that are both stylish and contemporary.
Completing this daisy chain bracelet tutorial, you’ll have created a charming, flower-inspired accessory. The simple beaded patterns make it a satisfying project for any skill level, leaving you feeling accomplished and eager to create more.
Final Thoughts on Making Daisy Chain Bracelets
Making a daisy chain bracelet is a rewarding project that combines creativity with simplicity. The process is therapeutic, allowing you to unwind while crafting something beautiful. With minimal materials like seed beads and memory wire, you can create delicate, flower-inspired designs that are both elegant and personalized. This tutorial is perfect for beginners, offering clear steps to master the basics and inspire confidence in your beading skills. Once completed, your bracelet serves as a charming reminder of your craftsmanship. Experiment with colors and patterns to make each piece unique, and enjoy the satisfaction of wearing or gifting your handmade creation.
Additional Resources
Explore online communities and video tutorials for more daisy chain patterns. Check out bead suppliers for materials and join forums to share your creations and learn tips.
Recommended Tutorials for Advanced Techniques
Once you’ve mastered the basics, explore advanced techniques like intricate beading patterns, wire wrapping, and multi-color designs. Check out video tutorials for step-by-step guidance on creating complex daisy chain variations. Online communities offer inspiration and tips for refining your skills. Try experimenting with different bead types, such as bicone or gemstone beads, for a unique look. For a professional finish, learn advanced crimping and wire-working techniques. Join forums or bead-making groups to share your designs and get feedback. With practice, you can create stunning, intricate daisy chain bracelets that stand out. These resources will help you elevate your beading craft to the next level.
Online Communities for Beading Enthusiasts
Joining online communities is a great way to connect with fellow beading enthusiasts and gain inspiration. Platforms like Facebook groups, Pinterest, and Instagram are filled with talented creators sharing their daisy chain bracelet designs. These communities offer a space to share your work, get feedback, and learn from others. Many forums and social media groups focus specifically on seed bead jewelry, providing tips and tricks for improving your techniques. Engaging with these communities can help you refine your skills and stay updated on the latest trends. Participate in discussions, ask questions, and showcase your creations to grow your passion for beading.