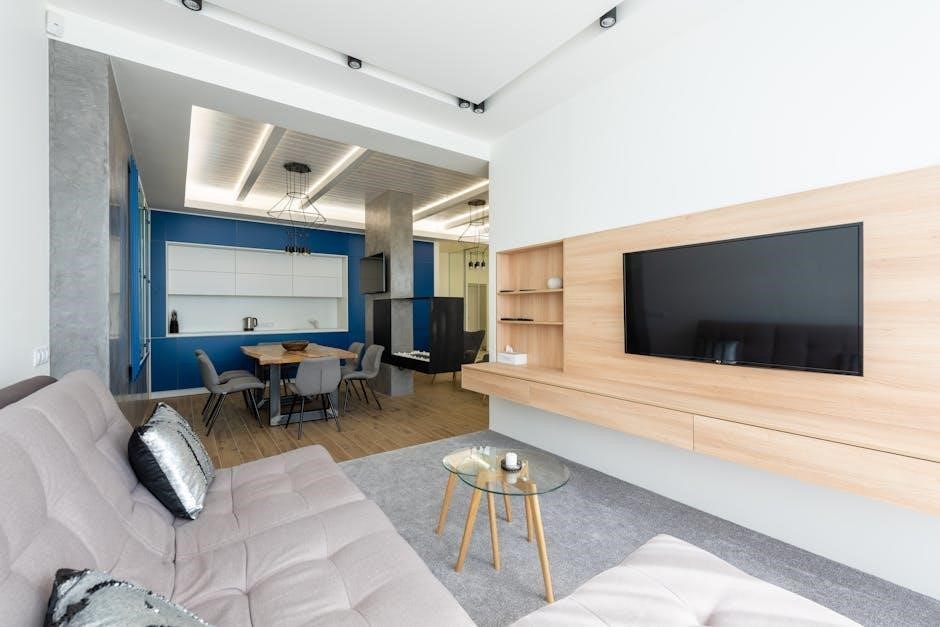
Mounting Dream TV mounts offer a comprehensive guide for installing your TV securely and efficiently. Models like MD2380 and MD2378 provide VESA compatibility and weight capacity up to 99 lbs, ensuring stability and safety. Follow these instructions carefully to achieve a perfect installation and enjoy optimal viewing angles and durability.
Overview of Mounting Dream TV Mounts
Mounting Dream TV mounts are designed to provide a secure and stable solution for mounting TVs of various sizes. Models like the MD2380, MD2378, and MD2413-KT cater to different TV sizes, ranging from 26 to 55 inches, with weight capacities up to 99 lbs. These mounts offer VESA compatibility, ensuring they fit most modern TVs. They feature adjustable tilt, swivel, and sliding options, allowing for optimal viewing angles. Made from durable materials, they ensure long-term stability and safety. Whether for wood stud or concrete walls, Mounting Dream mounts are versatile and easy to install, making them a reliable choice for homeowners and AV enthusiasts alike.
Importance of Following Installation Guidelines
Adhering to the installation guidelines ensures a safe and secure TV mounting process. Properly following the instructions prevents potential damage to the TV, mount, or wall. It guarantees the mount’s weight capacity and VESA compatibility are not exceeded, reducing risks of collapse. Correct installation also ensures optimal functionality, such as smooth tilt and swivel movements. Moreover, following the manual helps avoid voiding the product warranty. Safety warnings, like using appropriate tools and anchors, are crucial to prevent accidents. By carefully following each step, users can achieve a professional-level installation, ensuring their TV remains stable and securely mounted for years to come.
Pre-Installation Requirements
Ensure TV compatibility with VESA standards and weight capacity limits. Verify wall type (wood stud or concrete) and gather all necessary tools and hardware for a smooth installation process.
Checking TV Compatibility (VESA and Weight Capacity)
Before installation, ensure your TV matches the mount’s VESA standards, typically ranging from 75x75mm to 400x400mm. Verify the TV’s weight does not exceed the mount’s capacity, usually up to 99 lbs, depending on the model. Check your TV’s manual or manufacturer’s website for precise measurements. For Mounting Dream models like MD2380 and MD2378, compatibility is ensured for most 26-55 inch TVs. Proper VESA and weight alignment guarantees safe and stable mounting, preventing potential damage or safety hazards. Always cross-reference your TV’s specifications with the mount’s compatibility chart provided in the user manual or product packaging to ensure a secure fit and reliable performance.
Understanding Wall Types (Wood Stud vs. Concrete)
Identifying your wall type is crucial for a secure installation. Wood stud walls require locating the studs to anchor the mount, ensuring stability. Concrete walls need specialized anchors to hold the weight safely. Mounting Dream mounts are designed for both wall types, but improper installation can lead to damage or safety risks. Use a stud finder for wood stud walls and concrete anchors for solid walls. Always follow the manufacturer’s guidelines for your specific wall type to ensure a sturdy and reliable installation, preventing potential hazards and guaranteeing optimal performance of your TV mount.
Gathering Necessary Tools and Hardware
Before starting, ensure you have all required tools and hardware. Common tools include a drill, screwdrivers, level, stud finder, and wrench. Mounting Dream mounts often come with hardware like wall anchors, lag bolts, and TV brackets. Additional items like cable ties or a magnetic bubble level may be useful. Verify the hardware list in your specific mount’s manual to avoid missing items. Organize your tools and hardware beforehand to streamline the installation process. Double-check that all provided hardware matches your wall type (wood stud or concrete) and TV requirements for a safe and secure setup.
Model-Specific Instructions
Mounting Dream offers model-specific guides for MD2380, MD2378, and MD2413-KT. Each model has unique features like weight capacity (up to 99 lbs) and VESA compatibility (up to 400x400mm). Always follow the specific instructions for your mount to ensure proper installation and safety.
Mounting Dream MD2380 Installation Steps
The MD2380 installation begins with unpacking and preparing tools. First, locate the wall studs and mark the mounting area. Attach the wall plate to the studs using lag bolts, ensuring it’s level. Next, secure the TV brackets to the back of your TV, aligning with the VESA pattern. Hang the TV on the wall plate, adjusting for proper alignment. Tighten all screws firmly to ensure stability. Finally, test the mount by gently pulling on the TV to confirm it’s securely fastened. Follow the manual for specific torque and alignment details to ensure a safe and sturdy installation.
Mounting Dream MD2378 Setup and Configuration
The MD2378 setup begins with ensuring your TV meets the VESA and weight requirements. This mount supports TVs from 26 to 55 inches with a max weight of 30 kg (66 lbs) and VESA up to 400×400 mm. Start by attaching the brackets to the TV, aligning with the VESA holes. Next, install the wall plate on wood studs or concrete, ensuring it’s level. Hang the TV on the wall plate and secure it tightly. Adjust the TV for optimal viewing angles, utilizing the tilt and swivel features if available. Double-check all connections and tighten screws to ensure stability and safety. Follow the manual for precise torque specifications and alignment.
Mounting Dream MD2413-KT Specific Features
The MD2413-KT is designed for Plasma, LCD, and LED TVs, supporting sizes from 26 to 55 inches with a weight capacity of 60 lbs (27kg). It offers VESA compatibility, ensuring a secure fit for most modern TVs. This mount features adjustable arms, allowing for flexible installation with or without extending arms. Its slim design ensures a low-profile appearance while providing durability. The mount is suitable for both wood stud and concrete walls, offering versatility for different home setups. Additional features include easy tilt and swivel adjustments, enhancing viewing comfort. The MD2413-KT is a reliable choice for safe and stylish TV mounting, combining strength and flexibility.
Tools and Hardware
Ensure you gather all necessary tools and hardware before starting. Mounting Dream mounts come with standard hardware, but additional tools like drills and levels may be needed.
Required Tools for Installation
To ensure a smooth installation, gather the necessary tools: a drill with bits, screwdrivers (Phillips and flathead), a stud finder, a bubble level, an Allen wrench, and a pencil or marker. Additional tools like a socket wrench or pliers may be needed for specific models. While some hardware is provided (e.g., lag bolts, wall anchors), ensure you have a drill and level on hand, as these are not included. Optional tools, such as cable ties for organizing wires, can enhance the setup. Always refer to the user manual for model-specific requirements to avoid delays or complications during the installation process.
Hardware Provided with the Mount
The Mounting Dream TV mount includes essential hardware for installation, such as lag bolts, wall anchors, and TV brackets. Spacers and screws are also provided to ensure proper fitting and alignment. Some models come with additional features like an HDMI cable or cable ties for organizing wires. While the hardware is comprehensive, tools like drills and screwdrivers are not included, so ensure you have them ready. Always verify the contents against the user manual to confirm all parts are present. This ensures a smooth installation process and prevents delays. Make sure to double-check the hardware list before starting your project.
Optional Tools for Easier Installation
While the Mounting Dream TV mount includes necessary hardware, optional tools can streamline the installation process. A stud finder helps locate wall studs accurately, ensuring secure mounting. A magnetic bubble level provides precise alignment, while a power drill with screwdriver and drill bits speeds up the process. A socket wrench can be useful for tighter bolts, and cable ties help organize wires neatly. These tools are not included but can enhance efficiency and safety. Consider investing in them to avoid potential issues and ensure a professional-grade installation. Proper preparation with these tools will save time and reduce the risk of errors during setup.
Safety Precautions
Always follow weight and VESA limits to prevent damage or injury. Use appropriate tools to avoid over-tightening. Ensure proper installation to prevent safety hazards and ensure stability.
General Safety Warnings
Before installing your Mounting Dream TV mount, ensure the weight and VESA compatibility of your TV match the mount’s specifications to prevent damage or injury. Always use the provided hardware and avoid substituting with incorrect fasteners, as this may compromise stability. Ensure the wall can support the combined weight of the TV and mount, especially for concrete or wood stud walls. Never exceed the recommended weight capacity, as this could lead to the mount failing and the TV tipping over. Keep children away during installation, and ensure all bolts are securely tightened. Follow the manual carefully to avoid accidents and ensure a safe, stable installation.
Weight Capacity and Load-Bearing Safety
Never exceed the weight capacity specified in your Mounting Dream TV mount manual, as overloading can lead to structural failure. Check your TV’s weight, including any attached accessories, to ensure compliance with the mount’s limit. Models like MD2380 and MD2378 have capacities of 99 lbs and 66 lbs, respectively. Verify compatibility with your TV’s size and type. Use the provided hardware and anchors suitable for your wall type to ensure proper load distribution. Avoid adding extra weight post-installation, as this can stress the mount and compromise safety. Always double-check the manual for specific weight limits to prevent potential hazards and ensure a secure setup.
Installation Process
Start by securing the wall plate to studs or concrete, ensuring level alignment. Attach the TV brackets, then mount the TV onto the wall plate. Tighten all screws firmly for stability and safety.
Step-by-Step Wall Plate Installation
Begin by locating the wall studs or concrete anchors to ensure secure installation. Use a level to align the wall plate horizontally. Mark the screw holes with a pencil. Drill pilot holes into the wall, then insert the provided anchors or lag bolts. Mount the wall plate by screwing it into place, ensuring it is tightly secured. Double-check the level to confirm proper alignment. Tighten all screws firmly to prevent any movement. Once installed, attach the TV brackets to the wall plate according to the manufacturer’s instructions. This step ensures a stable base for your TV, guaranteeing safety and optimal viewing experience.
Attaching the TV Bracket to the TV
Attach the TV brackets by aligning the mounting holes on the back of your TV with the VESA-compatible slots on the brackets. Secure each bracket using the provided screws, ensuring they are tightened firmly. For models with extendable arms, attach the arms to the TV brackets and adjust as needed. Double-check that all screws are snug and the brackets are evenly aligned. This ensures a sturdy connection and prevents any wobbling or instability. Once attached, proceed to mount the TV onto the wall plate, ensuring a seamless installation process.
Mounting the TV on the Wall Plate
Once the wall plate is installed, carefully lift the TV and align the brackets on the back of the TV with the mounting slots on the wall plate. Ensure the brackets fit snugly and are securely fastened using the provided screws or clips. Tighten the screws firmly to prevent any movement. Use a level tool to verify the TV is straight. If applicable, adjust the tilt or swivel features to achieve the desired viewing angle. Double-check all connections and ensure the TV is evenly balanced on the wall plate before releasing it. This step ensures a stable and secure installation.

Troubleshooting Common Issues
Address alignment problems by adjusting the wall plate or brackets. Check weight limits to prevent overload and ensure proper VESA compatibility for a secure fit.
TV Not Level or Misaligned
If your TV appears uneven or misaligned, check the wall plate installation. Ensure all bolts are tightened evenly and the wall plate is level. Adjust the brackets by loosening the locking screws and repositioning the TV. Use a bubble level tool to confirm accuracy. If issues persist, verify VESA compatibility and weight distribution. Recheck the mounting hardware and wall studs for proper alignment. Ensure the TV is centered on the wall plate and all connections are secure for a stable and balanced installation. Proper alignment ensures optimal viewing and prevents long-term damage to the mount or TV.
Mount Not Fitting the Wall Studs Properly
If the mount doesn’t fit the wall studs, ensure the wall plate is correctly aligned with the studs. Use a stud finder to locate the studs accurately. Check if the mount’s bolt spacing matches the stud spacing. If using concrete walls, ensure anchors are properly seated. For wood studs, verify that lag bolts are securely tightened. If the issue persists, consider using longer bolts or consulting a professional. Proper fit ensures stability and safety, preventing potential damage or collapse. Always refer to the user manual for specific mounting hardware requirements and guidelines.
Weight Capacity Exceeded
If the weight capacity of your Mounting Dream TV mount is exceeded, your TV may become unstable or even fall. Check your TV’s weight, including all accessories, and compare it to the mount’s specified limit (e.g., 45 kg or 99 lbs for some models). If exceeded, immediately unmount the TV and consider a mount with higher capacity. Ensure proper distribution of weight and verify VESA compatibility. Refer to the user manual for guidelines. Exceeding weight limits voids warranties and poses safety risks. Always prioritize stability and safety to avoid potential damage or injury.
Maintenance and Care
Regularly inspect the mount for stability and clean dust from the TV area and mount. Ensure all bolts and screws are tightened securely.
Cleaning the Mount and TV Area
Regular cleaning is crucial to maintain the functionality and appearance of your Mounting Dream TV mount. Use a soft, dry cloth to wipe away dust and dirt from the mount’s surface. Avoid harsh chemicals or abrasive materials that could damage the finish. For the TV area, gently remove dust using a microfiber cloth to prevent scratches. Ensure the TV and mount are powered off before cleaning. This routine maintenance prevents dust buildup, ensuring smooth operation of adjustable features and preserving the overall quality of your installation.
Regular Checks for Stability
Performing regular checks ensures your Mounting Dream TV mount remains stable and secure. Inspect the wall plate and mounting brackets for any signs of loosening or wear. Tighten all bolts and screws as needed, following the torque specifications in the manual. Check the weight distribution to confirm it’s within the mount’s capacity. Ensure the TV is level and evenly balanced. These periodic inspections help prevent potential issues and maintain the safety of your installation. Additionally, visually examine the hardware for rust or corrosion, especially in humid environments, to uphold the mount’s durability and reliability over time.
Additional Features
Mounting Dream TV mounts offer adjustable angles, tilt options, and sliding features for optimal viewing angles. These features enhance flexibility and customize your TV setup seamlessly.
Adjustable Angles and Tilt Options
Mounting Dream TV mounts feature adjustable angles and tilt options, allowing users to customize their viewing experience. These mounts enable tilting the TV up or down to reduce glare and improve visibility. The adjustable angles ensure the screen is perfectly aligned for optimal viewing comfort. With smooth tilt mechanisms, users can effortlessly adjust the TV’s position to suit their seating arrangement. This feature is particularly beneficial for ensuring the best picture quality from any angle in the room. By providing flexibility and ease of adjustment, Mounting Dream mounts enhance the overall entertainment experience. Refer to your specific model’s manual for detailed tilt and angle specifications.
Sliding and Swivel Features
Mounting Dream TV mounts offer advanced sliding and swivel features, allowing users to position their TV with precision. The sliding feature enables lateral movement, making it easy to center the TV or shift it to accommodate different seating arrangements. Swivel functionality allows the TV to rotate, providing an optimal viewing angle from any position in the room. These features are ideal for enhancing flexibility and maximizing space, especially in multi-purpose areas. The smooth glide and swivel mechanisms ensure effortless adjustments, while maintaining stability and safety. This functionality ensures a seamless and enjoyable viewing experience tailored to individual preferences and room layouts. Follow the manual for proper adjustment techniques to avoid damage or misalignment.
Mounting Dream TV mounts offer a seamless installation experience, ensuring stability and optimal viewing angles. Follow the instructions carefully to complete the setup and enjoy your perfectly mounted TV.
Final Checks Before Completion
After installing your Mounting Dream TV mount, perform final checks to ensure everything is secure. Verify the TV is level, all bolts are tightened, and the mount is stable. Double-check the weight capacity and VESA compatibility to confirm they match your TV. Ensure the cables are neatly organized using provided ties. Test the TV’s movement, such as swivel or tilt, to ensure smooth operation. Lastly, confirm the wall plate is properly anchored to the studs or concrete. These final checks ensure a safe and enjoyable viewing experience with your newly mounted TV.
Enjoying Your Mounted TV
Once your TV is securely mounted, you can fully enjoy the benefits of your Mounting Dream setup. Adjust the TV to your preferred viewing angle, whether it’s tilted, swiveled, or slid into the perfect position. Ensure all cables are neatly organized using the provided ties for a clean look. Test the mount’s stability and durability by gently swaying the TV to confirm it’s firmly secured; With proper installation, your mounted TV will enhance your home entertainment experience, offering optimal viewing angles and a sleek, modern appearance. Take pride in your setup, knowing it’s both functional and visually appealing.